The Ultimate Guide to Airbnb Photography: Which Photos You Need to Win More Bookings
In the world of short-term rentals, your photos are your most important marketing asset. Before a guest reads your carefully crafted description or checks your amenity list, they are scrolling through your gallery. If your images don't capture their attention within the first three seconds, you've likely lost the booking. But many hosts struggle with knowing exactly what to photograph. Do you need a picture of the toaster? Should you include the hallway?
To help you maximize your occupancy and daily rate, we have compiled a comprehensive guide on exactly which pictures you need to take to create a high-converting Airbnb listing.
The Hero Shot: Your First Impression
Your cover photo is the single most important image in your listing. It is the one that appears in search results and determines your click-through rate. Usually, this should be a wide-angle shot of your most impressive space. For some properties, this is a stunning exterior with great curb appeal. For others, it is a sun-drenched living room or a master bedroom with a view.
When taking your hero shot, ensure the lighting is perfect. Aim for 'Golden Hour'—the hour after sunrise or before sunset—to get a warm, inviting glow. If you are shooting indoors, turn on all the lights and open every curtain. Your hero shot needs to scream 'luxury' and 'comfort' simultaneously.
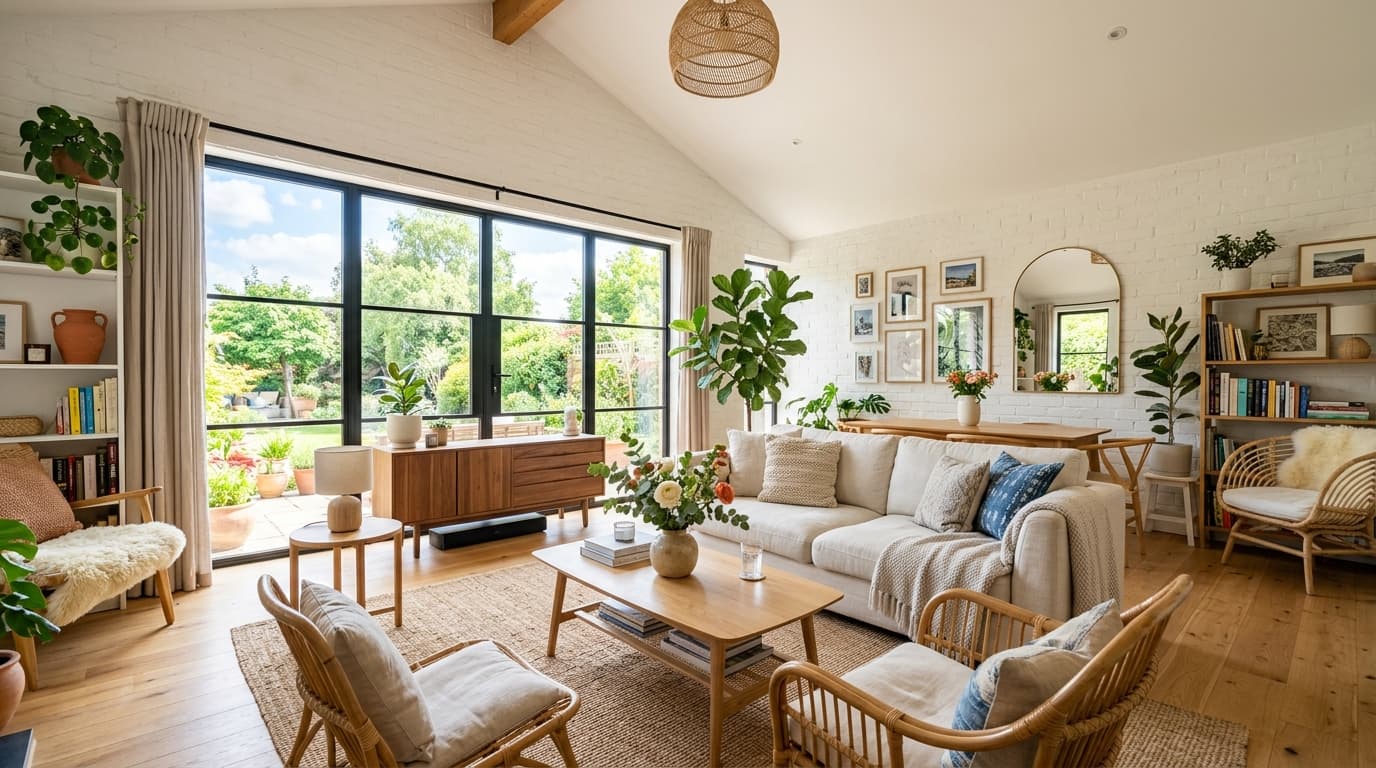
The Essential Room-by-Room Checklist
To give guests a full sense of the layout, you need a logical flow of images. Here is the breakdown of what to capture in each area:
The Living Area: Capture at least three angles. One should show the seating capacity (can all your guests sit comfortably?), one should show the entertainment setup (TV, fireplace), and one should show the connection to other rooms like the kitchen or dining area.
The Kitchen: Guests choose Airbnbs over hotels because of the kitchen. Take a wide shot showing the full layout, then a medium shot of the appliances. Make sure the counters are decluttered. A shot of a set coffee station or a bowl of fresh fruit can add a 'lifestyle' touch that makes the space feel lived-in but clean.
The Bedrooms: Each bedroom needs at least two photos. Focus on the bed—it should be professionally made with crisp linens and plenty of pillows. Show the bedside tables and any unique features like a reading nook or a workspace. If there is a closet or storage space, include a shot of it open to show guests where they can put their luggage.
The Bathrooms: Bathrooms are often the hardest to photograph but the most scrutinized by guests. Cleanliness is king here. Take a bright, clear shot of the vanity and the shower or tub. Avoid getting yourself in the mirror reflection! Fresh, fluffy white towels and high-end toiletries can make a standard bathroom look like a spa.
Capturing the Experience: Detail and Lifestyle Shots
Once you have the 'bones' of the house covered, it is time to sell the experience. These are the close-up shots that evoke emotion.
Think about the unique selling points of your property. Is there a record player with a curated collection? A cozy outdoor fire pit with s'mores kits? A high-end espresso machine? Take 'macro' or close-up shots of these items. These photos tell the guest what it feels like to stay at your place, not just what it looks like.
Don't forget the view. If your property overlooks a park, a city skyline, or the ocean, make sure that view is framed perfectly in at least one photo. If the view is the main attraction, consider taking a photo from the balcony or through a window to provide context.
The 'Boring' but Necessary Shots
Transparency builds trust. There are certain practical photos that help manage guest expectations and reduce the number of questions you get in your inbox.
The Entrance: Show the front door and the check-in process. If you have a smart lock, a photo of it can reassure guests that check-in will be easy.
Parking: If parking is a premium in your area, take a photo of the designated parking spot or the street view to show where they will leave their car.
Laundry and Utilities: If you offer a washer and dryer, show them. If you have a dedicated workspace with high-speed internet, take a photo of the desk and perhaps a screenshot of a speed test result.
Composition and Technical Tips
How you take the photos is just as important as what you take. Always shoot in landscape (horizontal) mode for Airbnb. Vertical photos often get cropped awkwardly in the app.
Keep your camera at 'waist height' or slightly lower. This makes rooms look larger and more architectural. Avoid using a fish-eye lens, as it distorts the space and can lead to 'expectation vs. reality' complaints from guests. Instead, use a wide-angle lens (around 16mm to 24mm) to capture the whole room without warping the walls.
Finally, pay attention to vertical lines. Ensure that the corners of the walls and door frames are perfectly straight and not leaning. This is the hallmark of professional real estate photography.
Polishing Your Portfolio with AI
You don't need a $5,000 DSLR to get professional results. Most modern smartphones are more than capable of taking great raw images. The magic happens in the editing.
This is where a tool like AirGlow becomes your secret weapon. Even the best photos can suffer from dull lighting or distracting clutter. AirGlow allows you to brighten shadows, enhance colors, and even virtually stage rooms that might look a bit empty. By running your photos through an AI enhancement process, you ensure that your listing looks polished, professional, and significantly more attractive than the competition down the street.